After a lot of googling, and going through some tutorials i could finally setup theAndroid NDK(Native Development Kit) on my machine and successfully compiled a C code, generated the library and ran the code on emulator.
I would like to post some issues that i had to go through while setting up the environment for compiling C code on Windows. Despite of the step-by-step procedure given here
http://mindtherobot.com/blog/452/android-beginners-ndk-setup-step-by-step/ and
http://www.pocketmagic.net/?p=1332
the cygwin setup was quite confusing for me.
Cygwin is a utility that provides Linux environment on windows, which is required to compile the C code into a library that is used by Android through jni(java native interface). To setup Cygwin go to the link and download setup.exe. Run the exe and check to install from internet, after that set the directory where setup will be installed as C:\cygwin(recommended), store the installation files at some safe place for further use D:\cygwinInstallationFiles. A list of Packages will appear in that choose Devel package and in that select make:The GNU version of 'make' utility'.
After completing the installation, go to the directory where cygwin is istalled(C:\cygwin) open the Cygwin.bat using a text editor and paste the following code there
DEV_ROOT represents your current project's working directory(in my case it is NDK_Demo)
The project must be organized as follows:
A) The JNI part (the .c and .h and Android.mk files) in:
D:/Work/AndroidNDK/NDK_Demo /jni
B) The JAVA part (assets,bin,gen,jni,libs,obj,res,src with the .java files) in:
D:/Work/AndroidNDK/NDK_Demo
For these paths always use forward slashes.
Save the file.
Now we come to making the Android.mk file, create a file Android.mk in the jni folder and paste the following code
Finally Run the cygwin.bat file by double clicking it. and navigate to your project folder as shown in fig
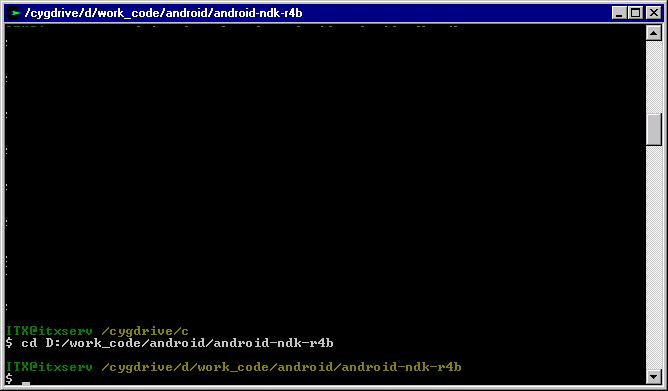
Type ./ndk-build to compile the JNI project.
The C files have been successfully built. Now using Eclipse, you can build the Java android project, and it will include the JNI part automatically. Easy.
Hope to come back soon with some development about MAC(iPhone).
I would like to post some issues that i had to go through while setting up the environment for compiling C code on Windows. Despite of the step-by-step procedure given here
http://mindtherobot.com/blog/452/android-beginners-ndk-setup-step-by-step/ and
http://www.pocketmagic.net/?p=1332
the cygwin setup was quite confusing for me.
Cygwin is a utility that provides Linux environment on windows, which is required to compile the C code into a library that is used by Android through jni(java native interface). To setup Cygwin go to the link and download setup.exe. Run the exe and check to install from internet, after that set the directory where setup will be installed as C:\cygwin(recommended), store the installation files at some safe place for further use D:\cygwinInstallationFiles. A list of Packages will appear in that choose Devel package and in that select make:The GNU version of 'make' utility'.
After completing the installation, go to the directory where cygwin is istalled(C:\cygwin) open the Cygwin.bat using a text editor and paste the following code there
@echo off
set IS_UNIX=
set DEV_ROOT=D:/Work/AndroidNDK/NDK_Demo
set JAVA_HOME=C:/Program Files/Java/jdk1.6.0_01
set CLASSPATH=D:/Work/AndroidNDK/NDK_Demo/obj
set PATH=D:/android-sdk-windows/SDK/tools;D:/android-ndk-r5/android-ndk-r6b-windows/android-ndk-r6b
set ANDROID_NDK_ROOT=/cygdrive/D/android-ndk-r5/android-ndk-r6b-windows/android-ndk-r6b
set NDK_PROJECT_PATH=/cygdrive/D/Work/AndroidNDK/NDK_Demo
C:
chdir C:\cygwin\bin
bash --login -i
DEV_ROOT represents your current project's working directory(in my case it is NDK_Demo)
The project must be organized as follows:
A) The JNI part (the .c and .h and Android.mk files) in:
D:/Work/AndroidNDK/NDK_Demo /jni
B) The JAVA part (assets,bin,gen,jni,libs,obj,res,src with the .java files) in:
D:/Work/AndroidNDK/NDK_Demo
For these paths always use forward slashes.
Save the file.
Now we come to making the Android.mk file, create a file Android.mk in the jni folder and paste the following code
LOCAL_PATH := $(call my-dir)
include $(CLEAR_VARS)
# Here we give our module name and source file(s)
LOCAL_MODULE := demo
LOCAL_SRC_FILES := demo.c
include $(BUILD_SHARED_LIBRARY)
Finally Run the cygwin.bat file by double clicking it. and navigate to your project folder as shown in fig
Type ./ndk-build to compile the JNI project.
The C files have been successfully built. Now using Eclipse, you can build the Java android project, and it will include the JNI part automatically. Easy.
Hope to come back soon with some development about MAC(iPhone).